Tuesday, October 31, 2006


HAPPY HALLOWEEN!!!!!!!

Euro Disney Halloween 2006


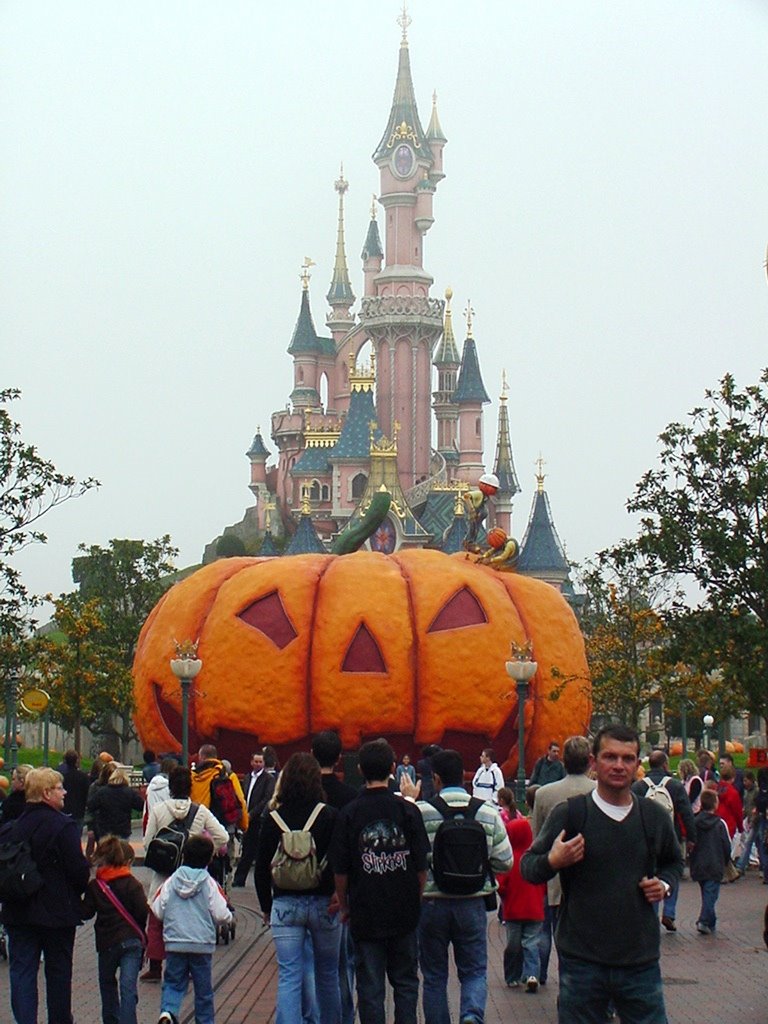
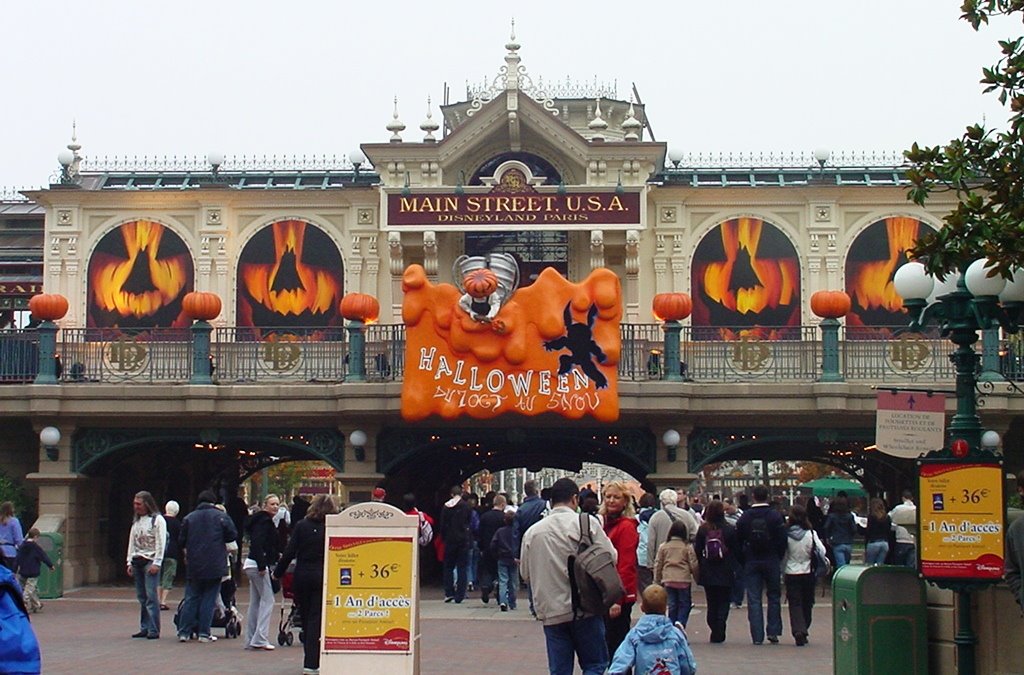
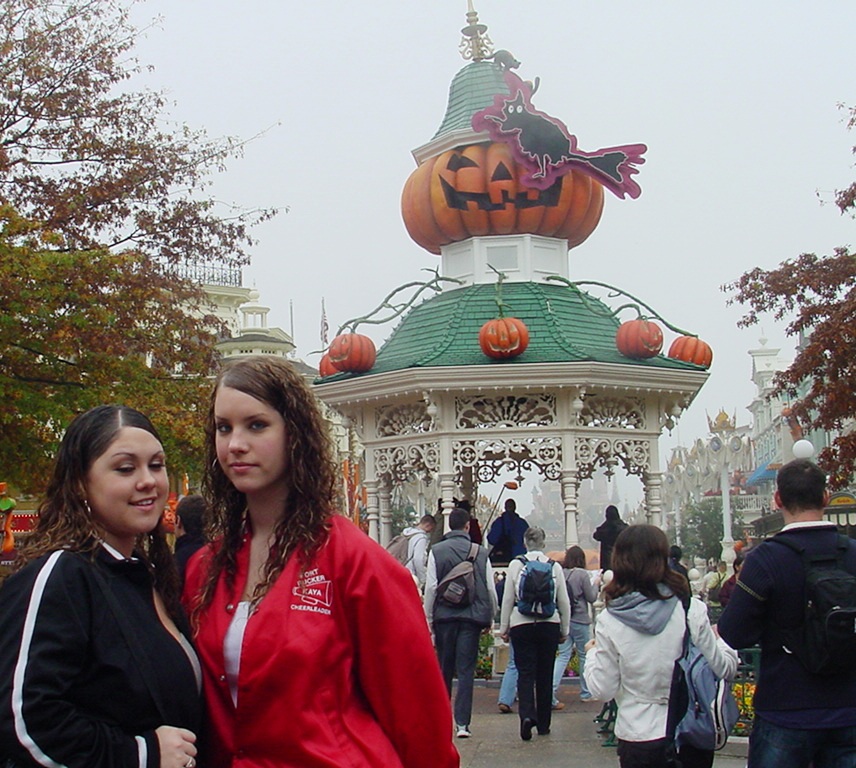
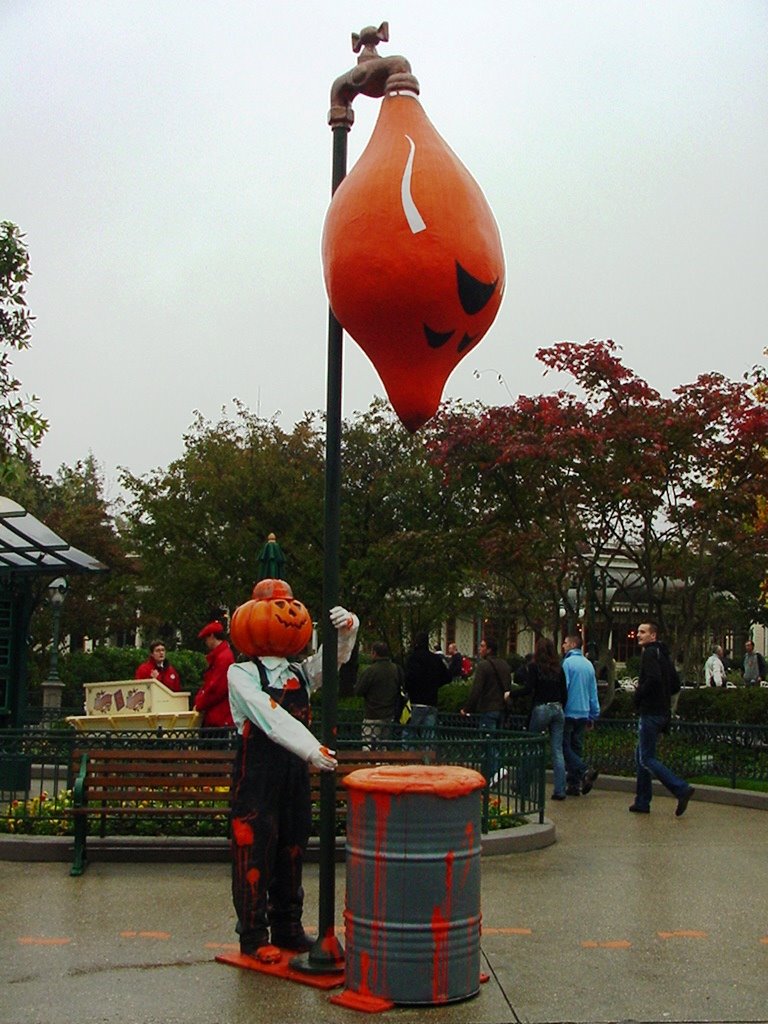
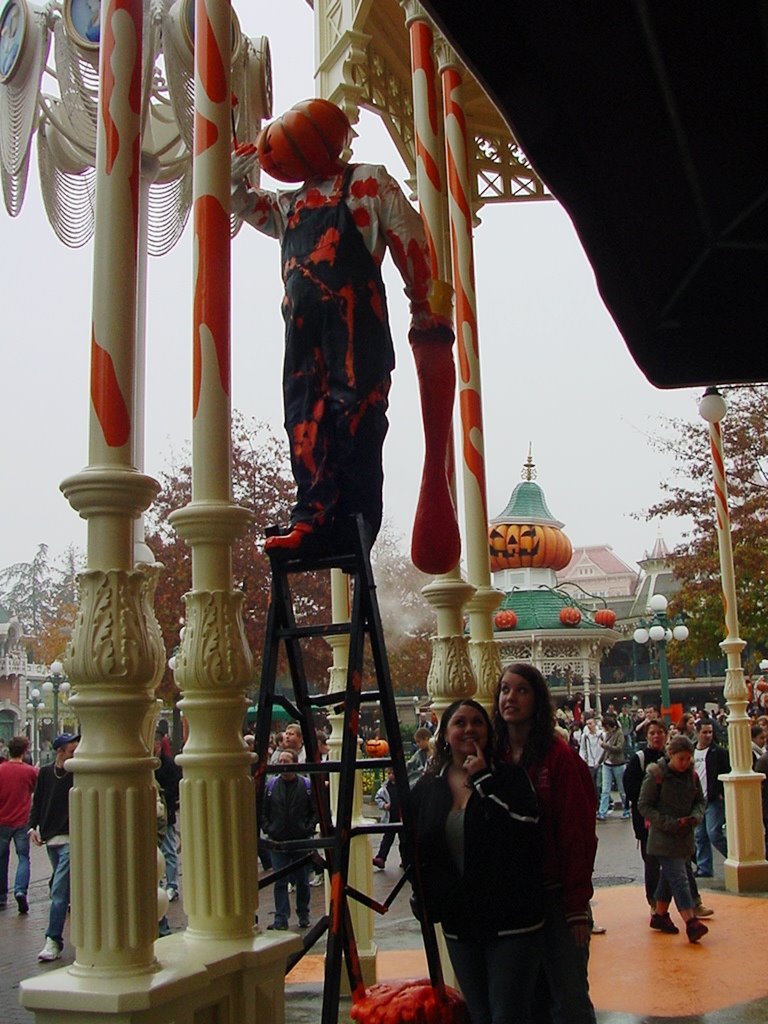
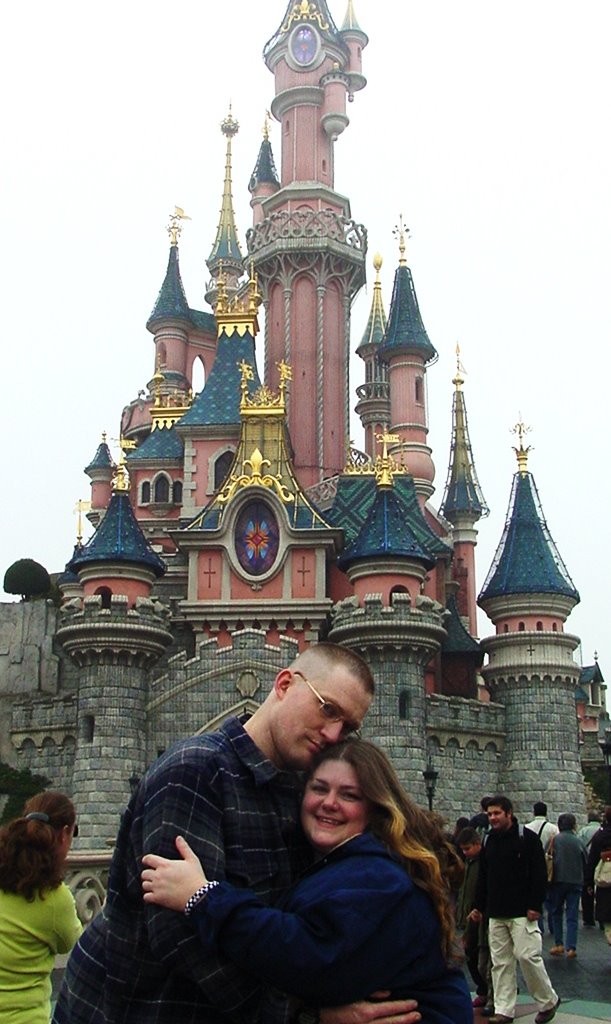
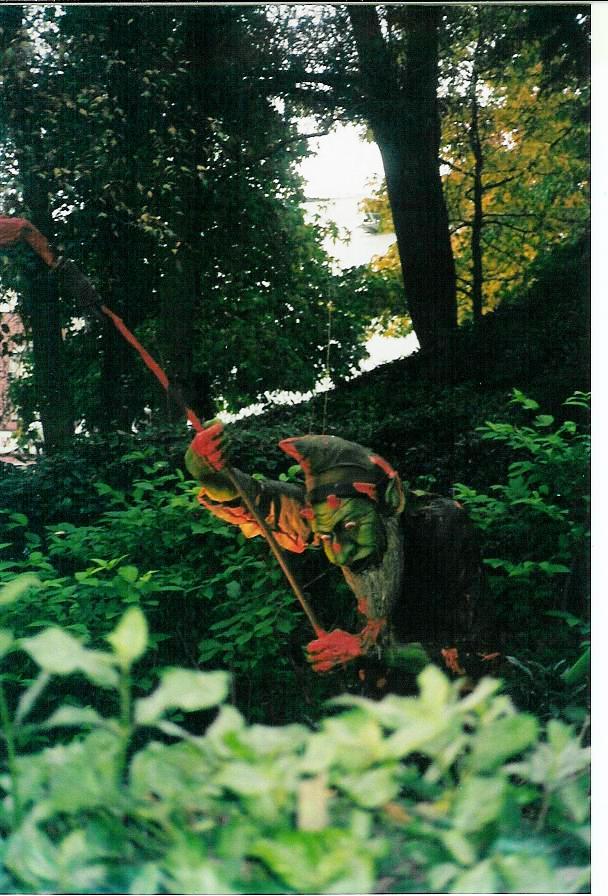
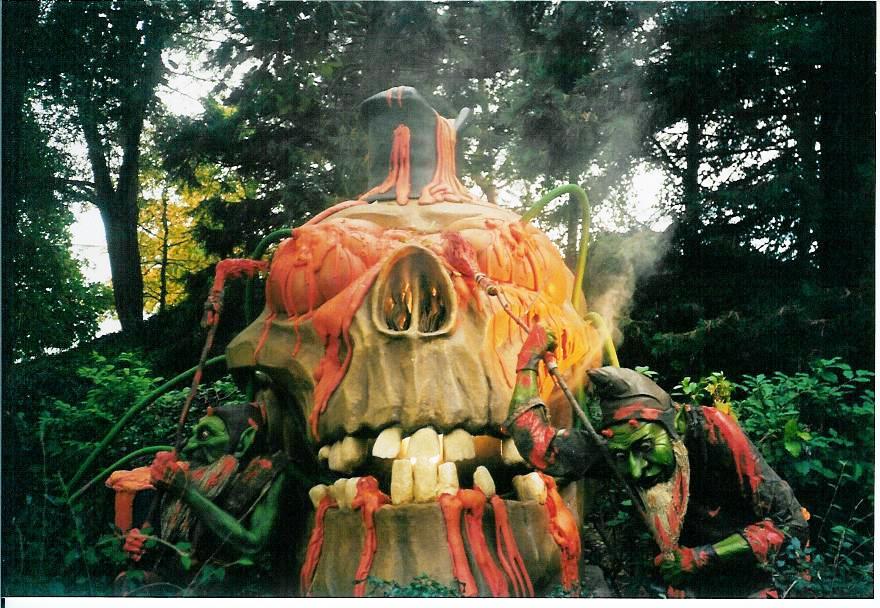
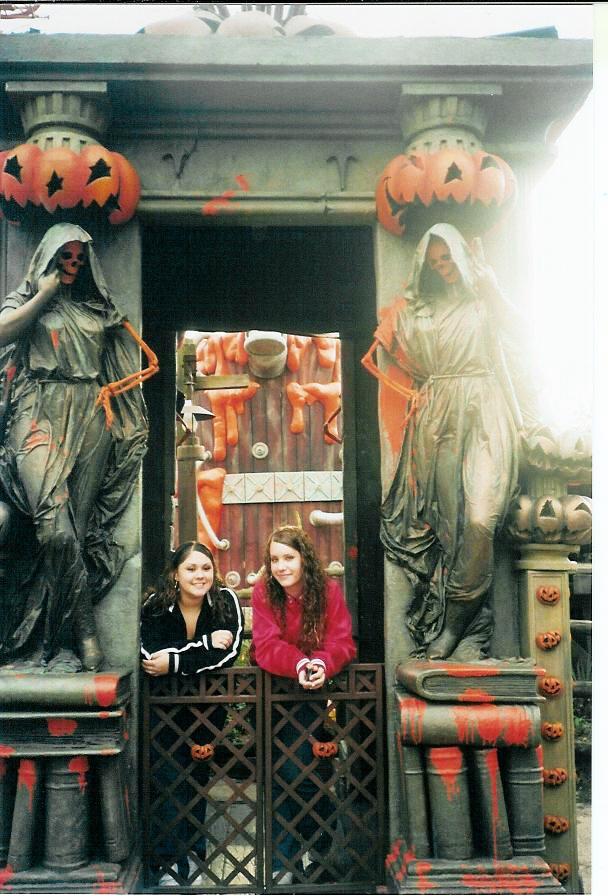
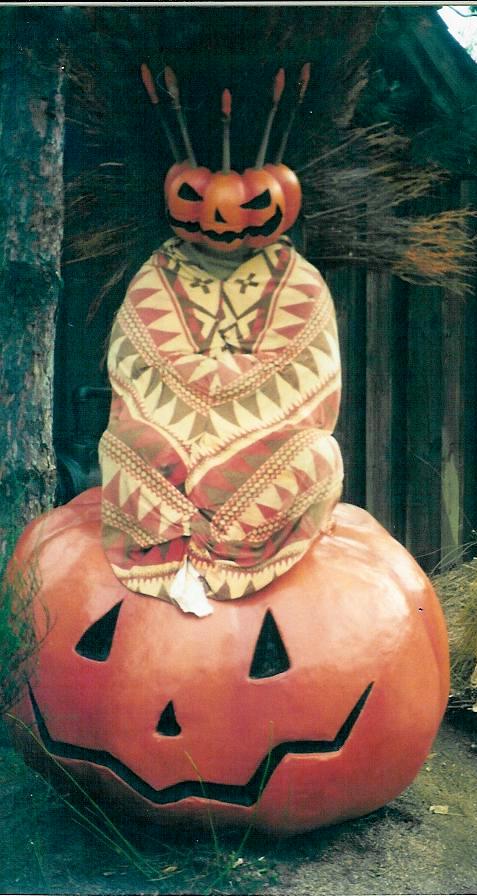
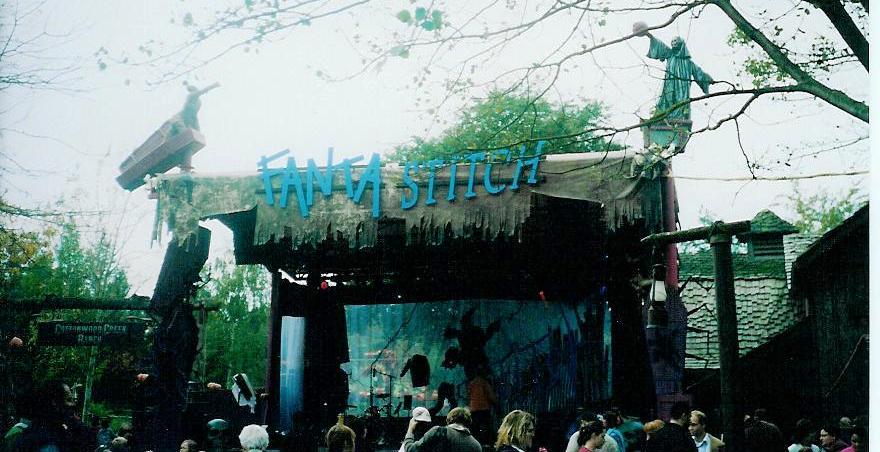
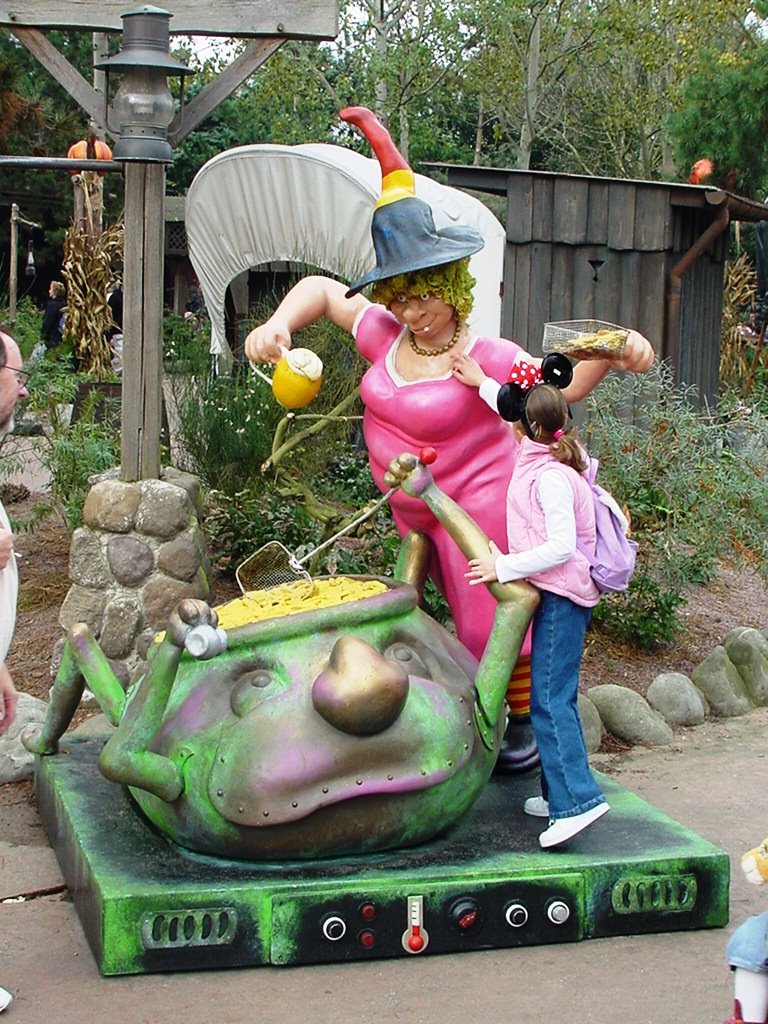
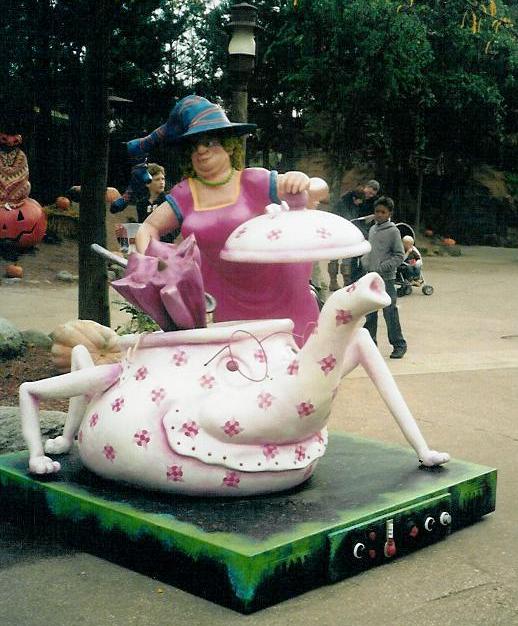
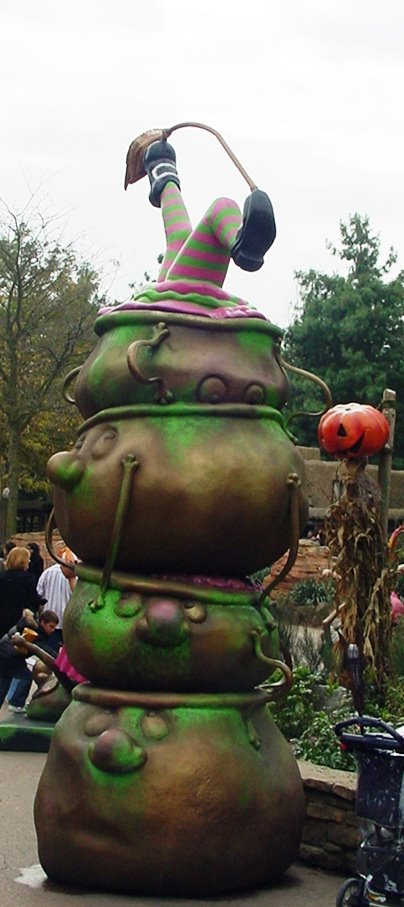
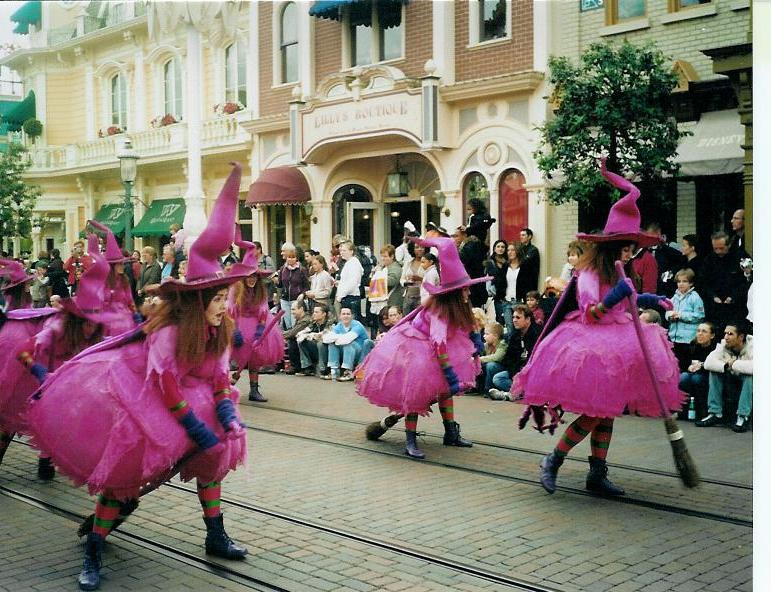
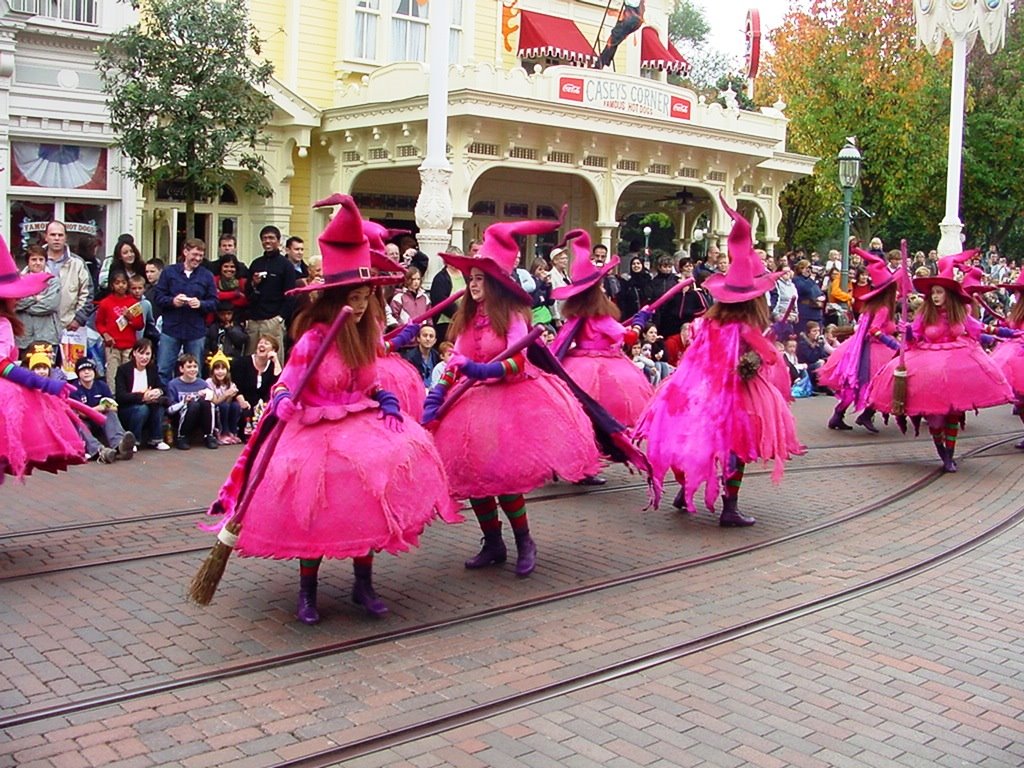
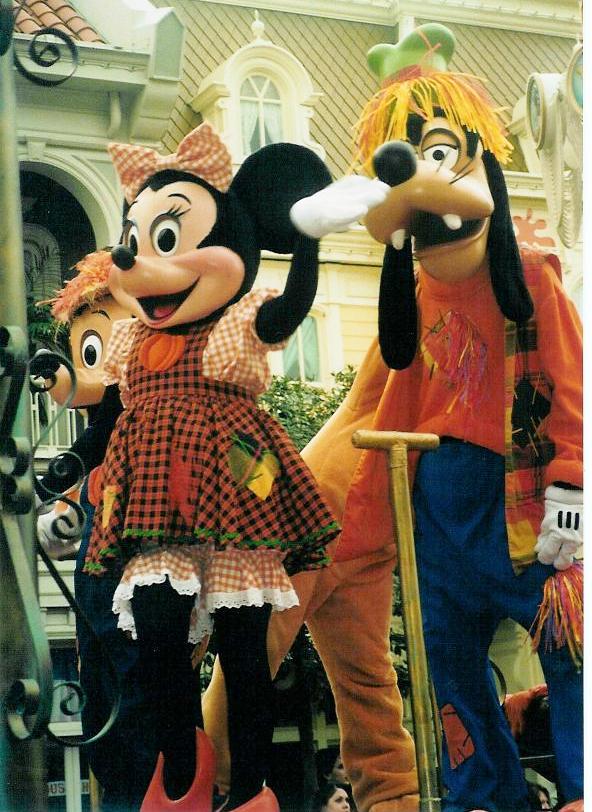
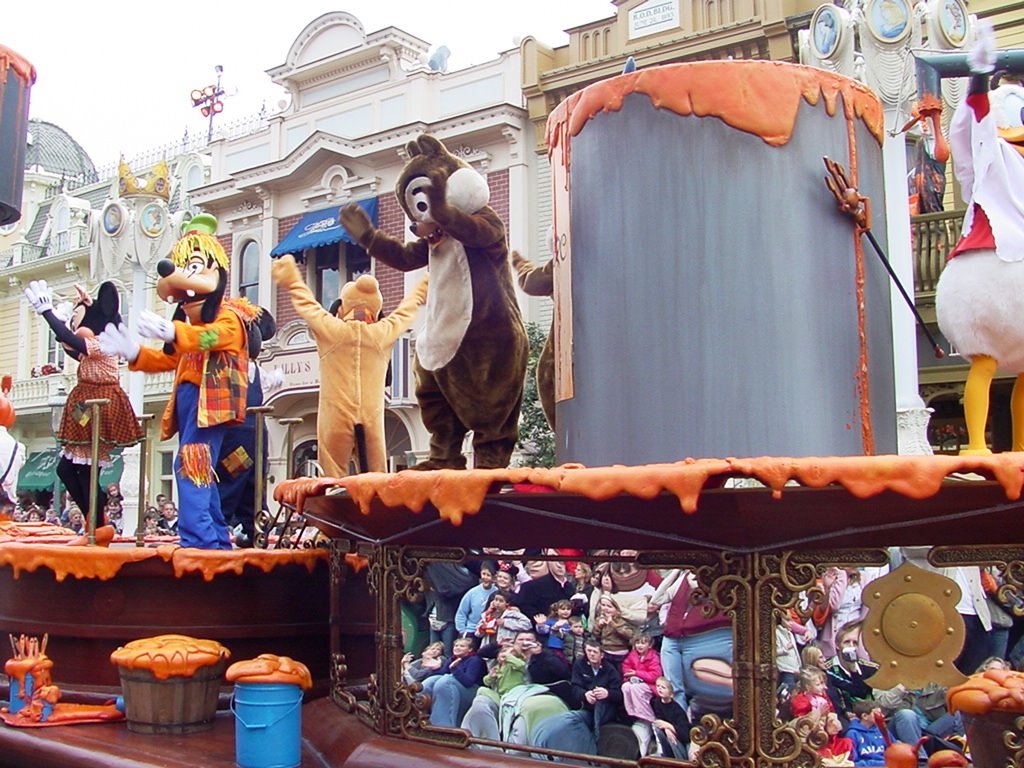
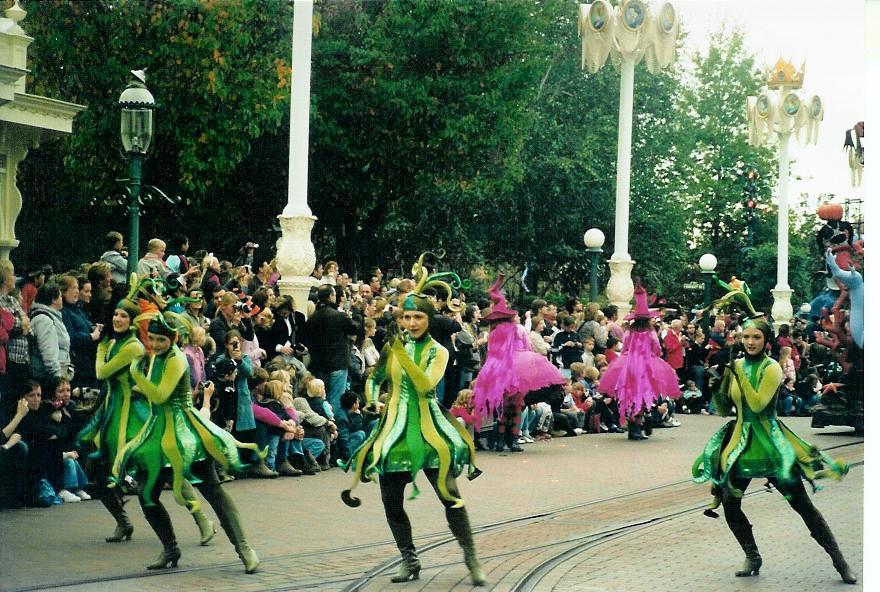
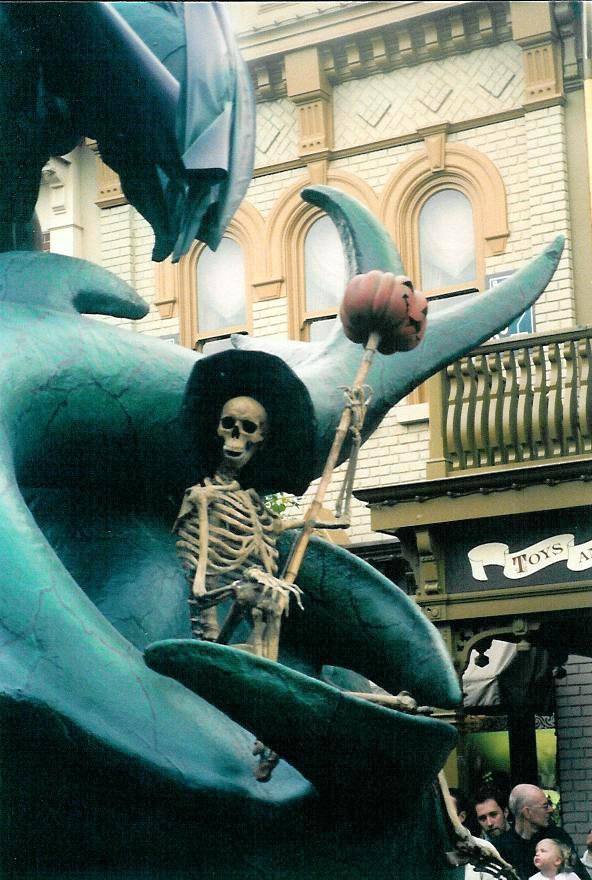
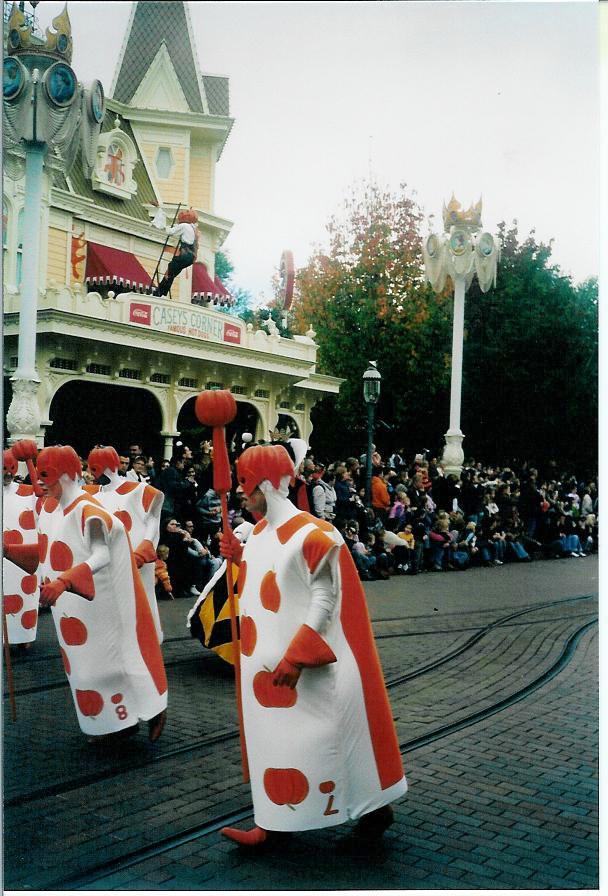
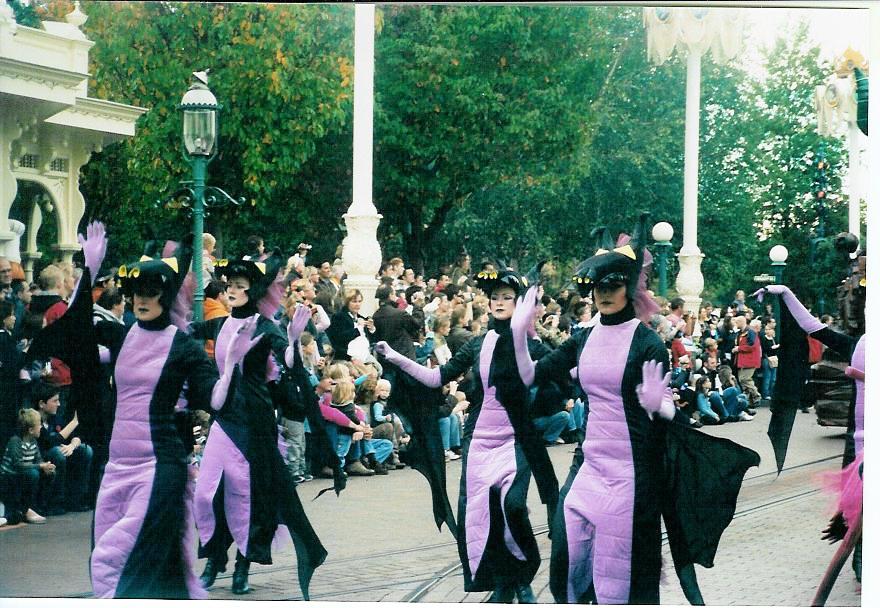
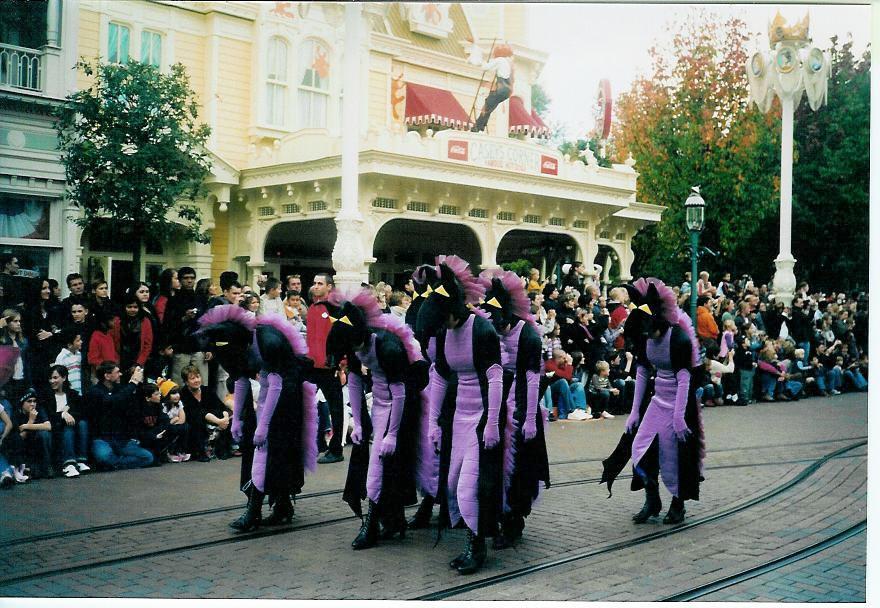
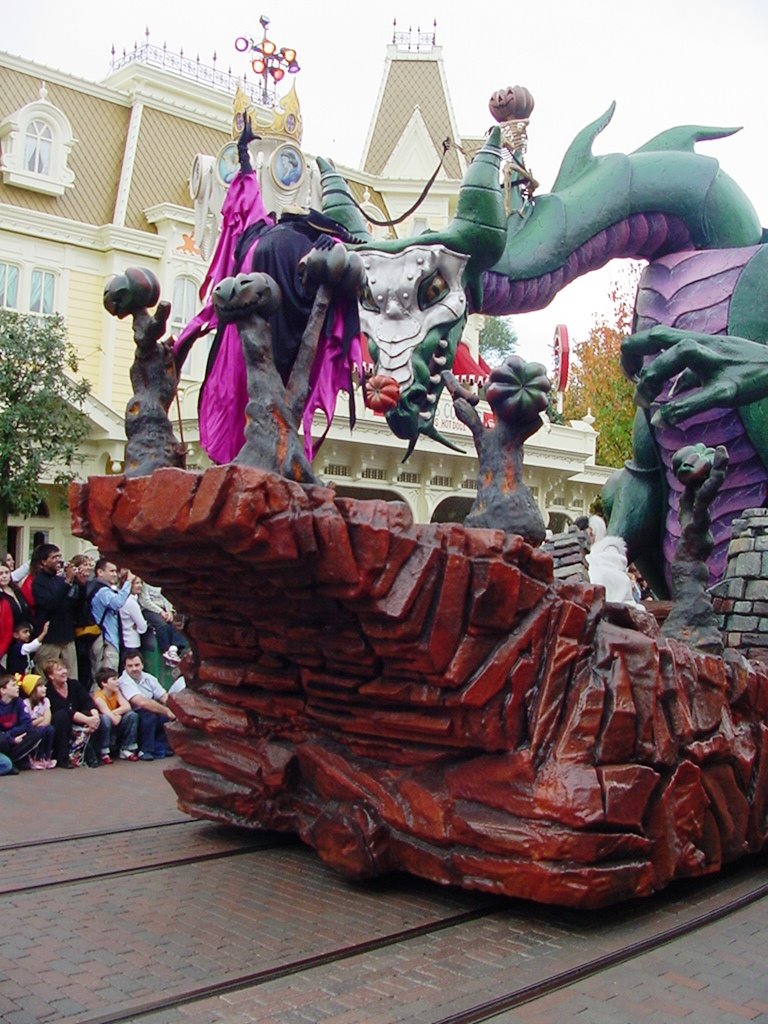
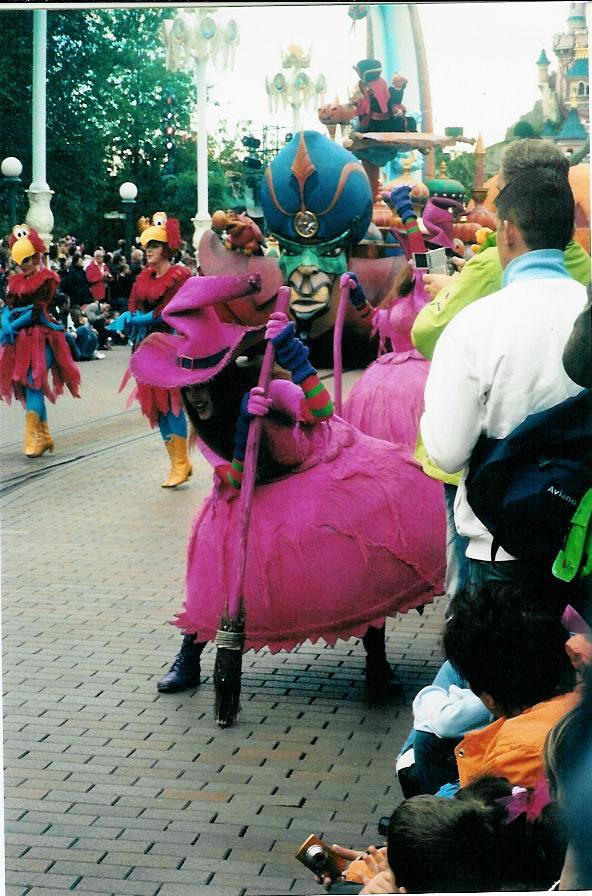
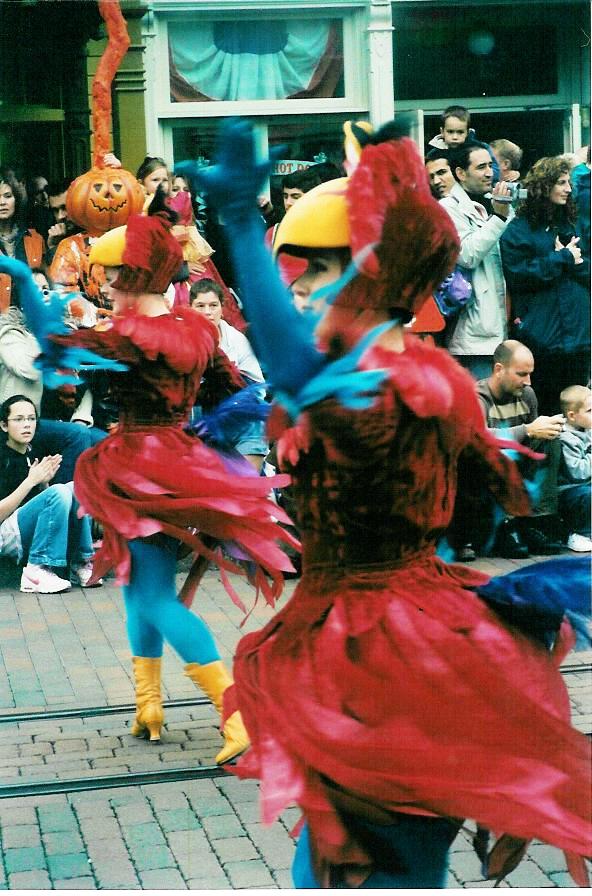
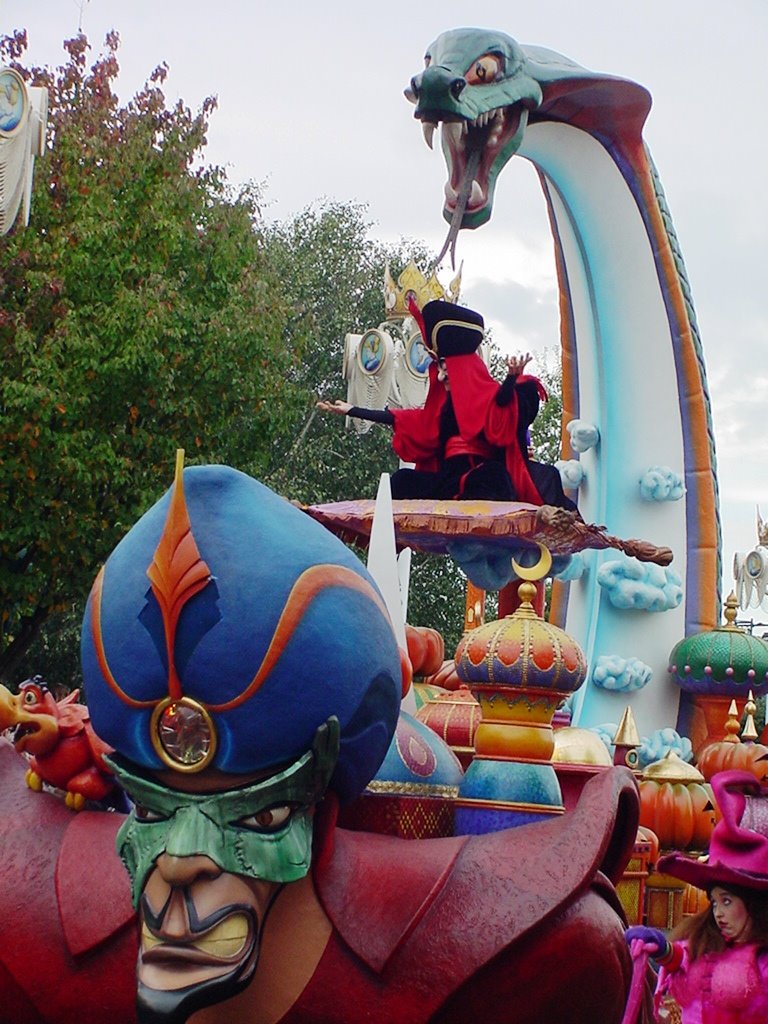
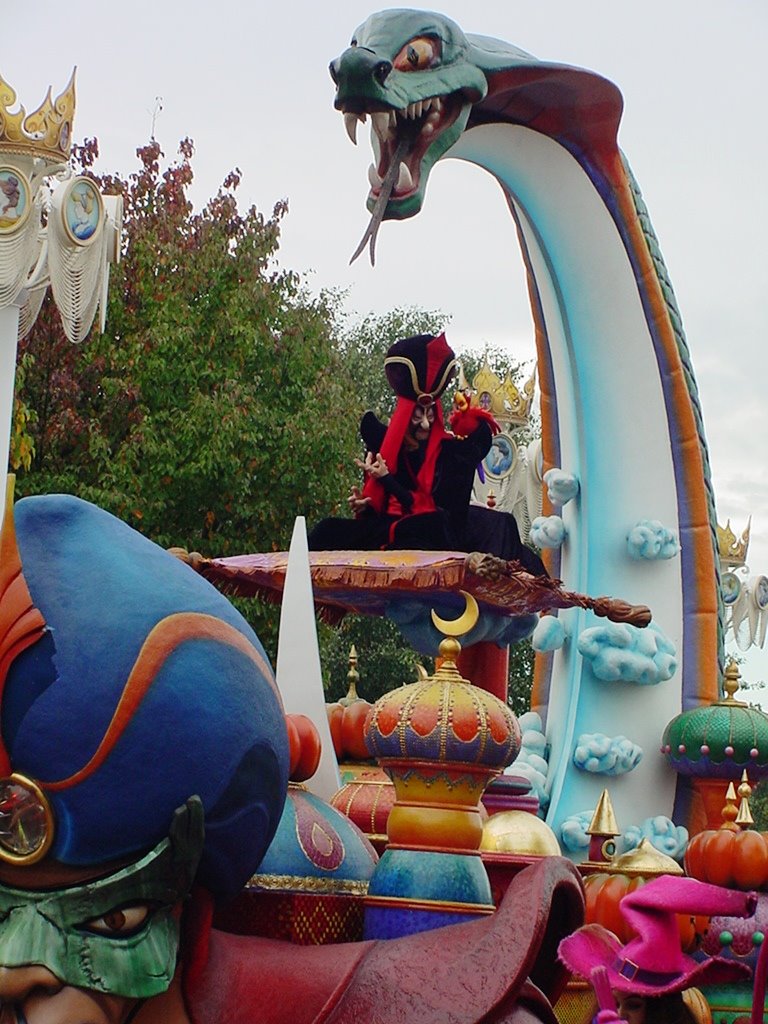
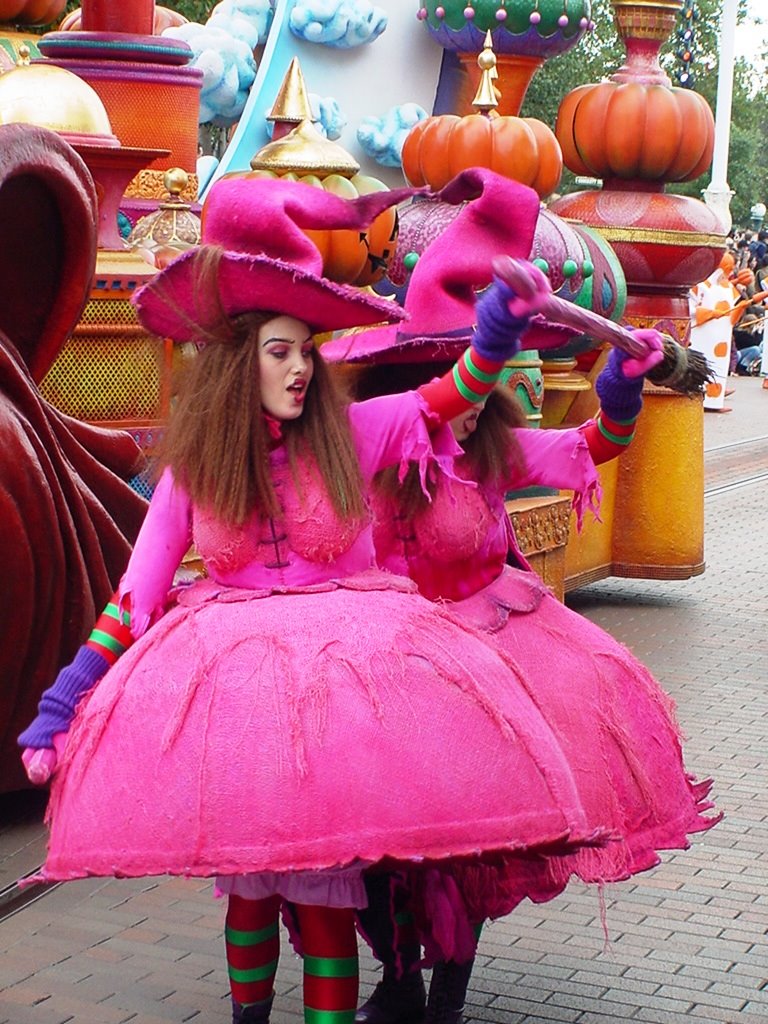
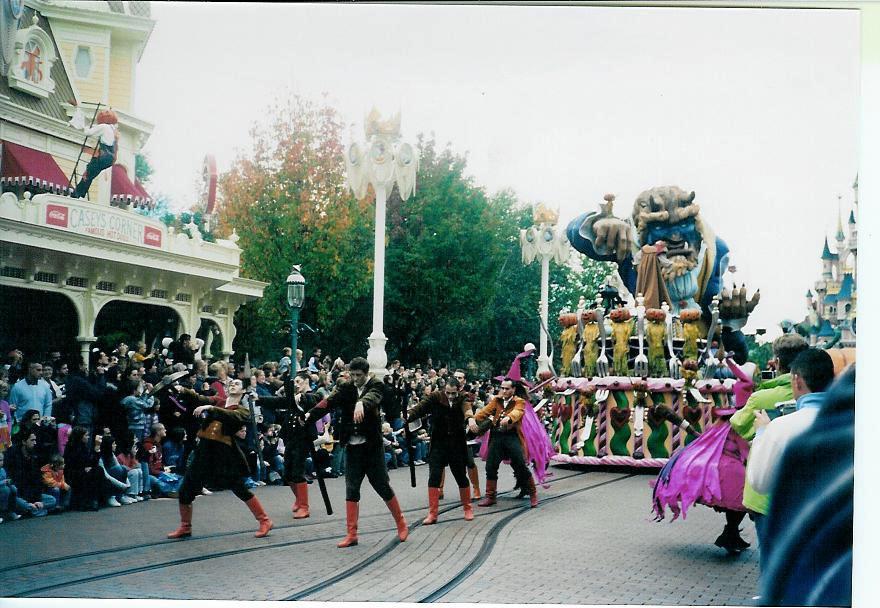
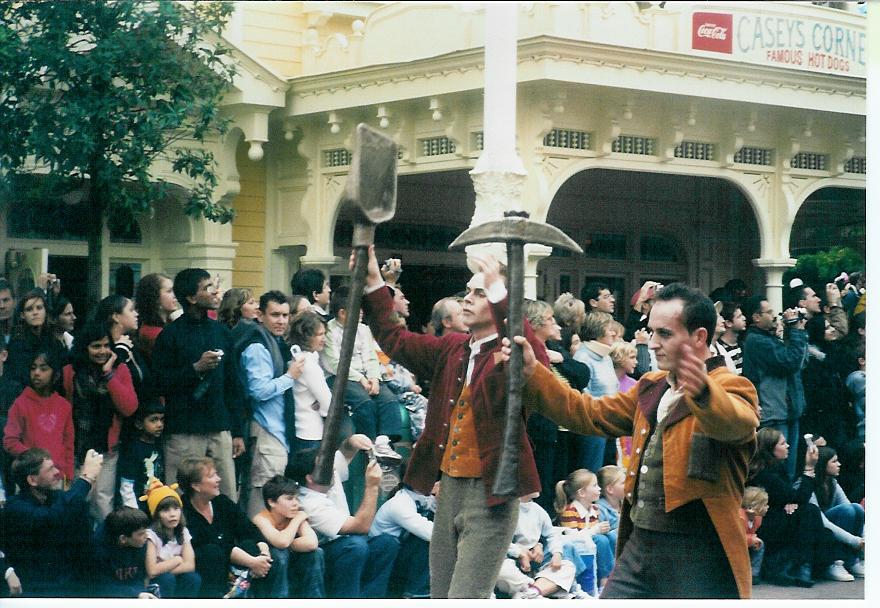
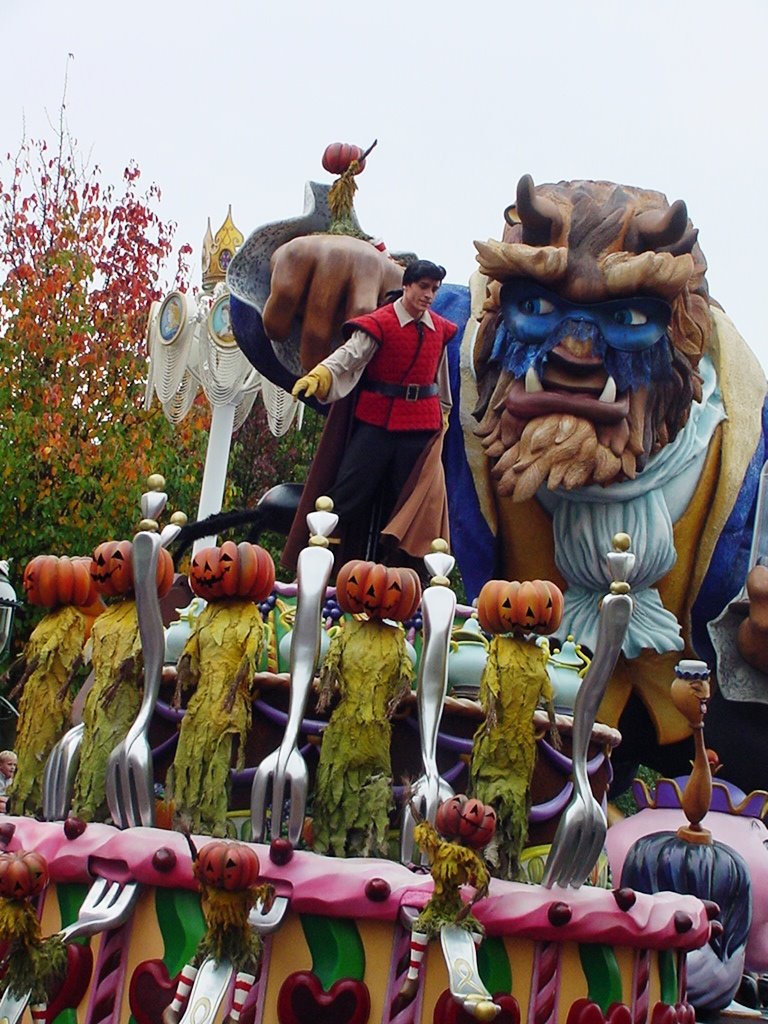
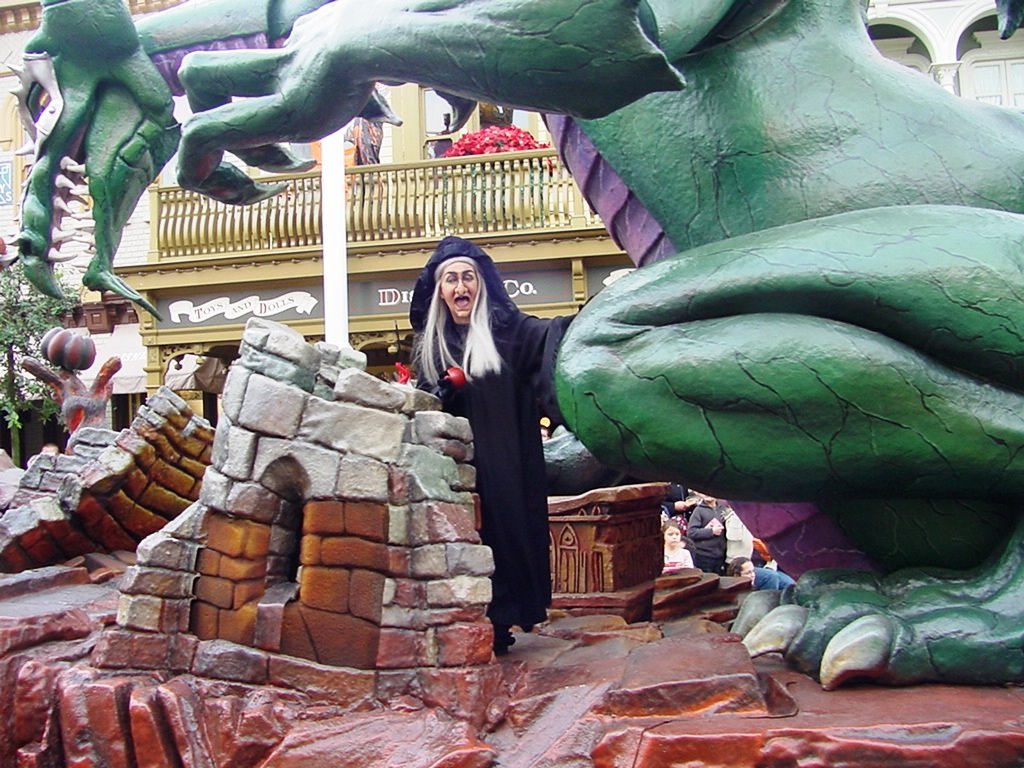
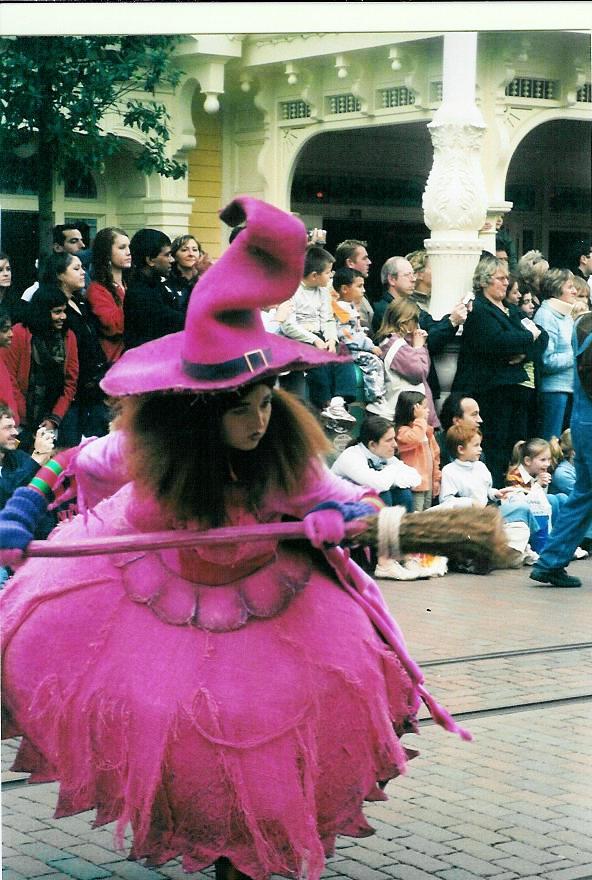
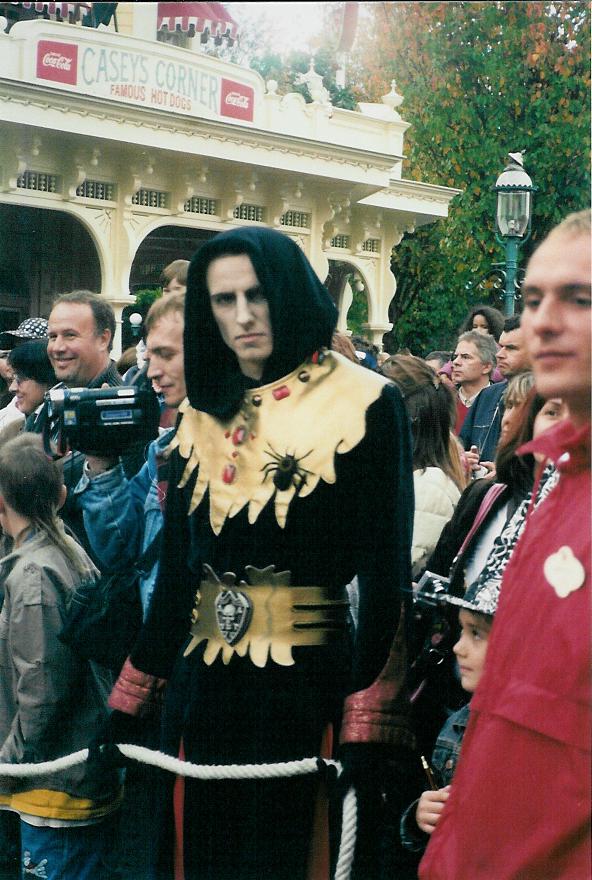
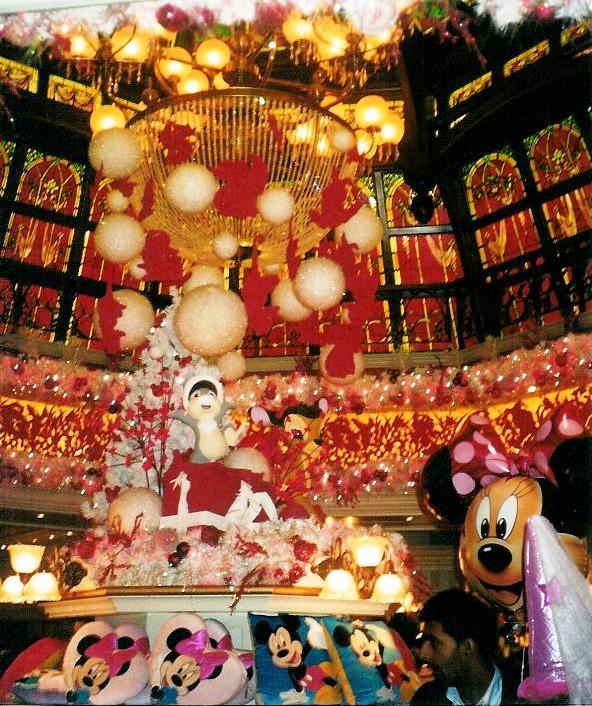
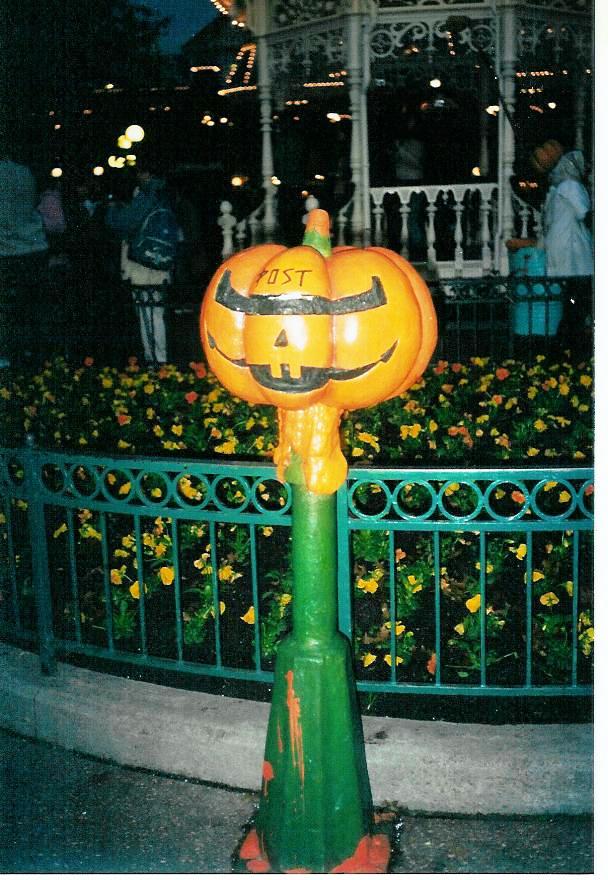
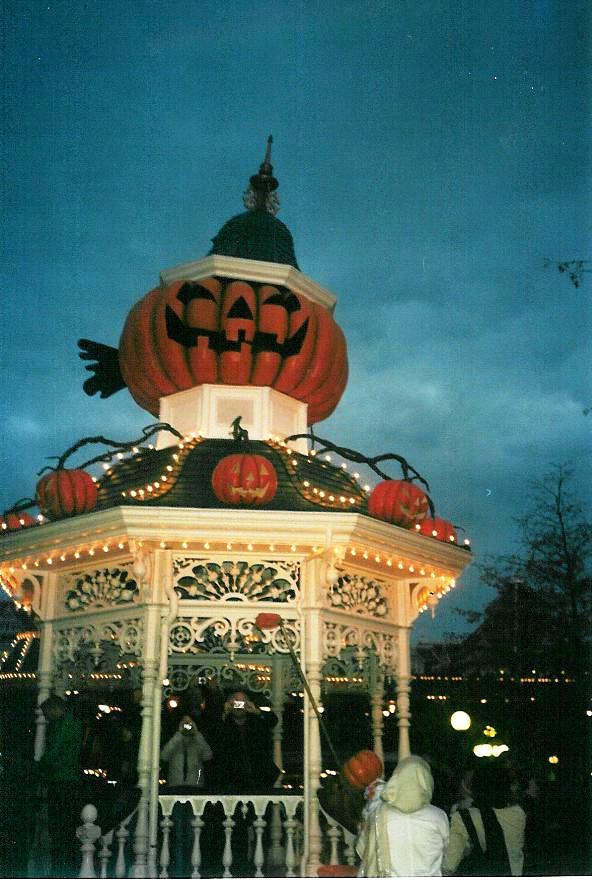
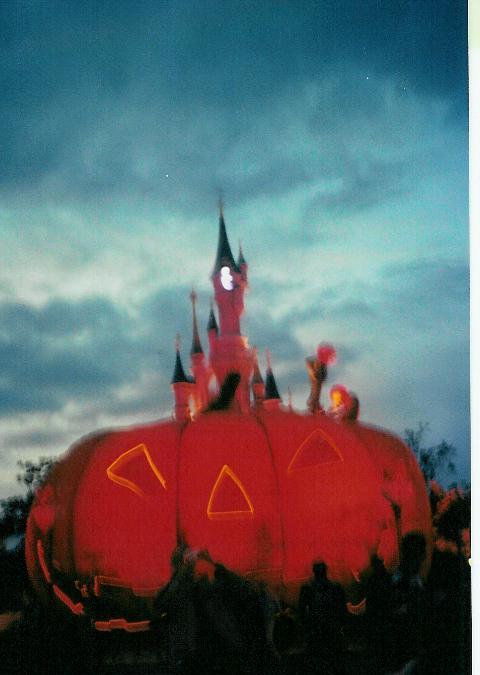
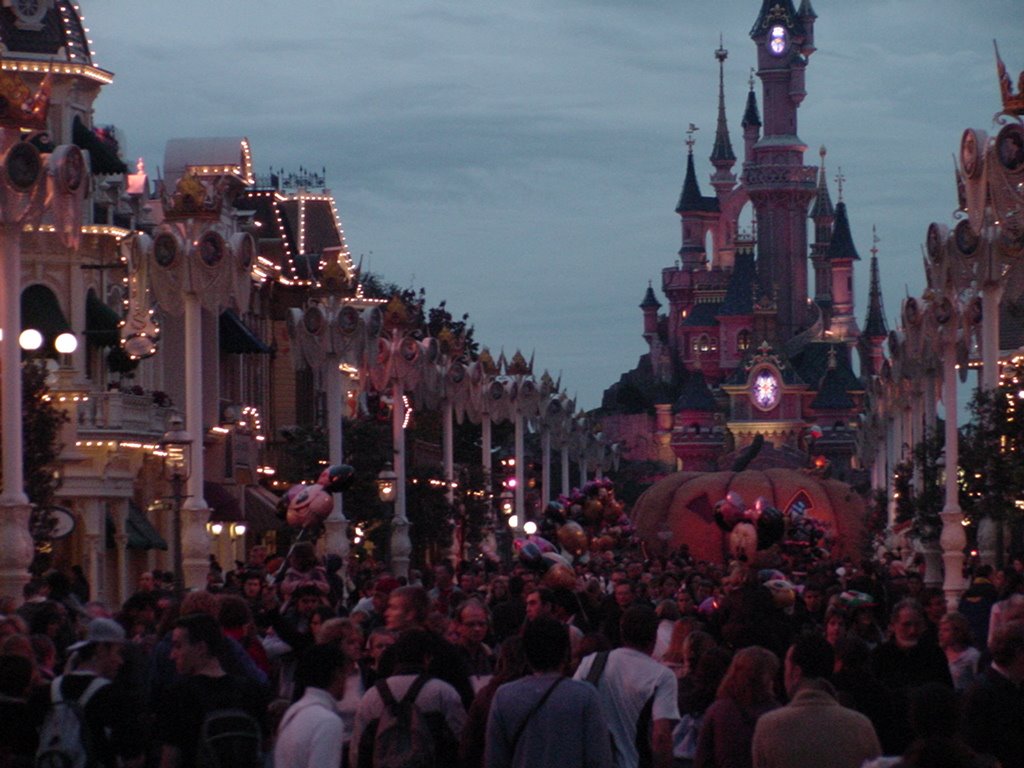
This Saturday (Oct 28th, 06) My family and my daughters best friend went and spent the day at Euro Disney for their Halloween Festivities. It was of course GREAT! The entire park had been painted orange by the mischievous pumpkin heads and their paint displays and orange paint footprints were everywhere. The witches were really awesome too as they were so brightly costumed in hot pink. They would go about the park sticking their tongues out at guest and doing little mischievous tricks to them. All the villains were out too bumping into guest and also being their "bad" selves. It was so much fun. Unfortunately our digital camera acted up. It didn't seem to like the disks we brought along so we had to rely on our 35 mm more than not. Then had to wait on the rolls to be developed (ug!) But here are some Pict's that we took while there. Oh and another thing...being so close to the holidays the park is in peak season so the lines were long and there were SO many people. The past few times we have gone its been off peak season and it was like we had the whole park to our selves...next time we go it will be off peak as that's extremely fun!!!! It was great however to see Halloween done Disney-style!!!!


Pumpkin Seeds (p1)


Its been a tradition since my daughter was young, that after we scoop out the innards of our pumpkins and carve them into jack-o-lanterns we clean up the seeds for baking.
We then dry them with a paper towel, place on a baking sheet (lined with foil) spray with cooking spray and sprinkle with salt. We bake them at 350 degrees for approximately 30 mins or til dry, crisp and lightly brown. Sometimes we add other seasonings for added flavor but I think we really like the simplicity of them with just salt. They are nice to snack on when we curl up on the couch and watch Halloween Movies!!!!

Some of my table decorations...

I totally forgot to take Pict's of a party we had just the other day.....its soooo not like me. I have a really nice cobweb black lace table cloth that I put over a pretty purple cloth. It really accented the cobweb overlay well. I had the whole house lit with candles, carved pumpkins and other neat effects. Here are just some things that I had lite the other night and I thought I'd get my camera out and get Pict's of at least some of it. ha ha. Bye the way, HAPPY HALLOWEEN TO YOU ALL!


Easy Gourd candles


This is a very easy table display!!! I got some gourds, cut off the tops, scooped out the insides and placed a candle inside of each one. I collected some pretty fallen leaves, laid them on top of a candle plate and placed the gourds and candles on top. Put a few figurines around the candle plate and it looked really cute, as you can see.


Festive Pumpkin Dip (p1)


Festive Pumpkin Dip

(p1 if you leave out the bread and crackers)

This one originally was to be placed in a bread bowl but I just used a hallowed and cleaned out pumpkin. The original recipe is on the site of: Taste of Home . I added a bit more or less of seasonings to get it to where I wanted it but it was very easy to make and good. Below is the original recipe.


You Will Need
12 ounces cream cheese, softened
3/4 cup cooked or canned pumpkin
2 tablespoons taco seasoning mix
1/8 teaspoon garlic powder
1/3 cup chopped dried beef
1/3 cup chopped green pepper
1/3 cup chopped sweet red pepper
1 can (2-1/4 ounces) sliced ripe olives, drained
1 round loaf (1 pound) Italian or pumpernickel bread
Fresh vegetables, crackers or corn chips


What to Do
1. In a mixing bowl, beat cream cheese, pumpkin, taco seasoning and garlic powder until smooth. Stir in beef, peppers and olives. Cover and refrigerate until ready to serve.

2. Just before serving, cut top off bread; scoop out bread from inside, leaving a 1/2-inch shell (save the bread from inside to make croutons or bread crumbs or save for another use). Fill shell with cream cheese mixture. Serve with vegetables, whole wheat or whole grain crackers, chips, pita or bread.

Stuffed Mushrooms (p1)


Witches fungus Toes (aka stuffed mushrooms)
I came up with this recipe the other day as I was cooking it. It got many compliments at my party too!!! I'm not exactly sure on the measurements but these are pretty close guestimations.

1 lb turkey sausage, cooked
1 frozen pkg chopped spinach, thawed and squeezed dried
1 8 oz cream cheese, soften
2 TAB dried Sage
2 tsp onion powder
2 tsp garlic powder
1 TAB minced garlic, from jar
2 tsp chili powder
4 oz blue cheese, crumbled
2 TAB parmesan cheese
salt and pepper to taste
1 med onion, diced and sauteed
stems of mushrooms, chopped and sauteed
I cant believe its not butter and olive oil for sauteing


Cook turkey sausage til cooked and crumbly and set aside in large bowl. Add a some I cant believe its not butter and a little olive oil to the same skillet and reheat. Add the onions and saute til tender and scrap into the same bowl as the sausage. Add a bit more " I cant believe its not butter" and olive olive if needed and saute the mushroom stems til tender, add some salt to this to bring out the flavor. When the stems are finished dump the sausage and onions back into the skillet with all the cheeses and seasonings and stir til heated through. Put back into the large bowl. Using a spoon stuff mushrooms and place on a baking sheet. ( I like to line mine with foil for easy cleanup). the mushrooms can be touching as you want to get as many on the baking sheet as you can. Spray lightly with cooking spray and sprinkle with a little salt. Bake 350 for 30 mins or til the mushrooms are tender. Place on a serving plate and ENJOY!

Sweet Pumpkin Dip (p2)

This recipe came from the site of: Cinnamon Dots Its really good and one to try for Halloween or Thanksgiving!!!!

Sweet Pumpkin Dip (p2)

Ingredients:
1 15 oz can pumpkin (not the pie filling)
8 oz FF or Sf Cool Whip
1 tsp cinnamon
1 3 oz box sugar free ff vanilla pudding (dry)

Mix together all of the above. Chill. Enjoy with low fat graham crackers, apples, or alone.

This is very light and fluffy... Great as a dip or as a pudding / fluff desert.

Dee's Melted Witch with fresh bloody glasses.....

Dee's Melted Witch with fresh bloody glasses.....

**1 to 2 (46 fl oz). Dole pineapple juice (not from concentrate)
**1 gal. Blue Berry Typhoon Hawaiian Punch

**1 to 2 - 2liter bottle of Diet Mountain Dew


Keep all ingredients in refrigerator til ready to mix. Mix 1 can of pineapple juice with 1/3 to 1/2 of the Hawaiian punch and 1 bottle of diet soda. Mix to taste and add to punch bowl. If you like you can make up some of this mixture ahead of time and freeze into an ice ring of your choosing.

NOTE: A really neat effect is to place this drink mixture in a couldren with some dry ice. I would have done this but couldnt seem to find any dry ice here, so I served mine in bloody glasses (see below)

“BLOOD”
glasses:

**3 to 4 tablespoons corn syrup
**1/2 teaspoon (or more) red food coloring

1. Pour the corn syrup in a shallow bowl. Dip a toothpick or spoon into the food coloring, and stir into the syrup to combine. Hold a glass by the stem, dip rim into the syrup mixture, and turn glass, coating entire rim. Turn the glass upright, allowing mixture drip down sides. Dip the remaining glasses. Set aside.
NOTE: don't just set the glass into the mixture as you will get too much...holding the glass at an angle is really better and allows you to get just a little on the rime.

Chocolate Peanut Butter Cake with Butterfinger Crumble Top (NOT SB FRIENDLY)


This cake is WONDERFUL!!!!! Even though its not South Beach Friendly I will definitely make it again. Its very versatile too as its not just one for Halloween! I got this great recipe from: VeryBestBaking. I ended up only using peanut butter chips and semi sweet chocolate chips and it worked out great. I also ended up using more chips than it called for on top and loved the extra texture of the hardened layer ontop. Everyone at the party totally LOVED this cake and this really went so fast I didn't have time to get any Pict's. This is a piece I had left over... and even it didn't last long!

Butterfinger Crumble-Topped Chocolate Peanut Butter Cake
Estimated Times:
Yields - 15

Ingredients:

  • 1 2/3 cups (11-oz. pkg.) Nestle toll house, peanut butter & Milk Chocolate Morsels, divided ( I Just used peanut butter chips)
  • 1/2 cup Nestle toll house, semi-sweet chocolate chips
  • 2 1/4 cups all-purpose flour
  • 1 teaspoon baking soda
  • 1/2 teaspoon salt
  • 1 1/2 cups granulated sugar
  • 3/4 cup (1 1/2 sticks) butter or margarine, softened
  • 1 teaspoon vanilla extract
  • 3 large eggs
  • 1 cup water
  • 2 bars (2.1 oz. each) NESTLÉ BUTTERFINGER Candy Bar, coarsely chopped
Directions:
PREHEAT oven to 325° F. Grease 13 x 9-inch baking pan.

MICROWAVE 1 cup peanut butter and milk chocolate morsels and semi-sweet morsels in medium, uncovered, microwave-safe bowl on MEDIUM-HIGH (70%) power for 1 minute; STIR. The morsels may retain some of their original shape. If necessary, microwave at additional 10- to 15-second intervals, stirring just until melted.

COMBINE flour, baking soda and salt in small bowl. Beat sugar, butter and vanilla extract in large mixer bowl until creamy. Add eggs one at a time, beating well after each addition. Beat in melted morsels. Gradually beat in flour mixture alternately with water until smooth. Spread into prepared pan.

BAKE for 40 to 45 minutes or until wooden pick inserted in center comes out clean. Immediately sprinkle remaining peanut butter and milk chocolate morsels. Let stand 5 minutes or until morsels are shiny; spread evenly. Sprinkle with BUTTERFINGER® pieces. Cool completely in pan on wire rack.

Cobweb Cupcakes (NOT SB FRIENDLY)


This great recipe came from a wonderful site I often visit: verybestbaking.com
I had my daughter and her friend decorate them for me and they both enjoyed it. The ones pictured here were not the better ones...as I totally forgot to take Pict's of the party table. These were the left overs that weren't as "cute" as the others. So as you can see even the "messed up" ones are really still adorable! We used decorating gels; white, brown and black. The black and white gave a better contrast but we soon ran out of the black so these last ones were made with brown. Still they turned out very well. Another thing the girls did was split the frosting into to batches. One was a sold cream/white as you can see there and the other they added food coloring to and turned a bright orange. Both looked great on the table with the cobwebs and spider on top.

Estimated Times:Preparation - 20 min | Cooking - 20 min | Cooling Time - 30 min cooling | Yields - 24

Ingredients:
  • 1 pkg. (18.25 oz.) devil's food or yellow cake mix
  • 2 (2.1 oz. each) NESTLÉ BUTTERFINGER Candy Bar, chopped
  • 1 container (16 oz.) prepared vanilla frosting
  • 1 cup (6 oz.) NESTLÉ® TOLL HOUSE® Semi-Sweet Chocolate Morsels
  • 1 small tube white decorator icing or gel
  • 2 pkgs. (1.7 oz. each) NESTLÉ BUTTERFINGER BB'S Candies
Directions:
PREPARE cake mix batter according to package directions; add chopped Butterfinger to batter. Bake according to directions for 24 cupcakes. Cool completely. Frost cupcakes.

PLACE morsels in small, heavy-duty plastic bag. Microwave on HIGH (100%) power for 45 seconds; knead. Microwave at additional 10- to 15-second intervals, kneading until smooth. Cut small corner from bag; squeeze to pipe concentric circles on top of frosting. Using wooden pick or tip of knife, pull tip through chocolate from center to last circle to create a cobweb effect.
OR use premade gels or decorating icing as we did

MAKE 2 dots using decorator icing on each of 24 Butterfinger BB's to resemble spider eyes. Place in center of each cobweb.

VARIATION: Substitute vanilla frosting with chocolate frosting. Substitute melted chocolate morsels with 2 small tubes white decorator icing or gel.

Friday, October 20, 2006

Red and Black Bean Pie (p2)

I found this recipe in the (October 06 edition) Evryday Food Magazine. It looked really good and sounded pretty simple....and it was! I have not had polenta before but decided I'd try it with this recipe. The entire dish was very hearty and tasty! We will definitely have it again. I added cumin to this recipe and it reminded me a little of my Chili Verdi in flavor, which I love. Either this is one to try.
Red and Black Bean Pie (p2)

(Serves 8)

2 TAB vegetable oil (I used olive oil)
2 bunches scallions, white and green parts separated and thinly sliced
4 garlic cloves, minced (I used minced garlic from a jar)
2 cans (15oz) pinto beans, drained and rinsed
2 cans (15oz) black beans, drained and rinsed
1 can (14.5 to 15 oz) diced tomatoes with juice
1 tub (16oz) plain prepared polenta, patted dry
1 packed cup fresh cilantro leaves, chopped (plus more for garnish optional)
1/2 tsp hot sauce, such as Tabasco
1 1/2 c shredded pepper jack cheese (I used a Mexican blend)
salsa and sour cream (optional)
salt and pepper to taste
I added 1 to 2 tsp of cumin

Preheat oven to 400 and grease 8 ramekins or custard cups with oil or nonstick spray.

In a skillet add oil, garlic, and chopped white parts of scallions (I also added the thicker light green parts too). Cook til soften, stirring constantly, 2 to 3 mins. Add beans, tomatoes with juice. The original recipe said to add 1/2 cup water but I didn't and it turned out great. Cook and mash about 1/4 of the beans with the back of a spoon against the side of the pan to release the starch. Reduce heat and cook til thickened, 10 to 15 mins.


Meanwhile slice polenta crosswise into 8 rounds; place 1 round in each greased ramekin or custard cup.

Remove bean mixture from heat. Stir in chopped green part of scallions, cilantro, and hot sauce; season with salt and pepper. (I added some cumin in too and it was really yummy). Spoon into the ramekins/custard cups and top with shredded cheese. (**to freeze, see below)

Bake at 400 degrees, 15 to 20 mins til the dish is hot and the cheese is browned and bubbly. If desired, garnish with cilantro, salsa, and a small dollop of sour cream.

**To freeze: let unbaked pies cool completely (as the bean mixture will be hot); cover with aluminum foil. Freeze up to 3 months. Bake frozen in foil - covered ramekins at 400 degrees until warm in center, 60 to 70 mins. Remove foil; bake until cheese is golden brown, about 15 minutes ore more.

Thursday, October 19, 2006

Blushing Apples (p2)

(I got this from the [KRAFT] Food and Family, fall 06 edition Magazine)

Blushing Apples (P2)
Makes 4 servings, 1 apple each.


2pkg (4 -serving size each) Jello-O brand strawberry flavored gelatin
1/4 tsp. ground cinnamon (I used more)
4 cups water 4 medium apples, such as Granny Smith,McIntosh or Golden Delicious
1/2 c thawed cool whip

Mix dry gelatin mix and cinnamon in 3 to 4 qt. saucepan. Add water and bring to a boil on med heat. Stir frequently until gelatin is completely dissolved. Apples: peel and core apples. Add to gelatin mixture in saucepan; partially cover saucepan with lid. Return to boil. Reduce heat to medium-low; simmer 10 to 15 mins or until the apples are fork tender. Gently turn apples every 5 min. When finished remove apples from sauce pan and serve warm (or cool if you prefer) Store apples in tightly covered container in refrigerator.
Serve each apple topped with 2 TAB cool toppin
g and garnish with fresh mint, if desired.

Tuesday, October 17, 2006

Parmesan-crusted chicken (p2)

First of all let me say my photo's of this dish does NOT do it justice!


This Parmesan-Crusted Chicken is so GOOOOOD. Its from the March 06 edition of Everyday Food Magazine. On the page it notes: Lorraine Radke, Sacramento, Ca....I think its her recipe...so props to you girl!!!!
I changed it up a bit to make it more Sb legal and not only does it look really pretty, it smells wonderful as its cooking and it tastes GREAT.


Parmesan-crusted chicken (p2)
4 slices of ww bread, torn into large pieces
1/2 c grated parmesan cheese
2 TAB coarsely chopped fresh parsley
1/4 each salt and pepper
1 large egg, lightly beaten (I used two)
4 boneless, skinless chicken breast cutlets (i found it worked better for me to cut each into strips...it cooked more evenly )
2 TAB Olive oil
2 TAB fresh lemon juice (i used bottled)
1 TAB Dijon mustard
2 TAB cold butter, cut into small pieces (i used 2 TAB from ICBINB stick butter)
1 pkt of Splenda (optional but I'd suggest it)
(and perhaps a little corn strach as the
lemon-Dijon sauce if often a bit thin)

1) In food processor, pulse bread, Parmesan, parsley and 1/4 tsp salt and pepper until fine and crumbles form. Transfer to a shallow bowl: place beaten egg in another.

2) One at a time, dip chicken cutlets (or strips) into egg and then into the breadcrumb mixture. press firmly to get the breadcrumbs to stick well

3)Heat 1 to 2 Tab Olive oil in large nonstick skillet over med heat (note: the nonstick skillet is important as my skillets are old and not very good and the breading stuck and pulled from the chicken). Cook cutlets a few at a time and add 1 to 2 TAB more oil if needed for each new batch, until through, 2 to 3 Min's per side (approx)

4) Wipe skillet clean. Add lemon juice and 1/4 cup water; cook on low or med til steaming, 1 min. Add mustard and remove from heat, and stir in butter until combined. (note: i added one packet of Spenda for a sweeter sauce and REALLY LIKED IT!). Drizzle over chicken and serve.
Note: when adding butter to the lemon-Dijon sauce, be sure to stir vigorously with a wooden spoon or heat proof spatula. (ya may want to add a bit of cornstarch if this it too thin)


Baked Chicken Stuffed with Sun-Dried Tomato Pesto, Basil, and Goat Cheese (P1)

(6 servings, recipe created by Kalyn (Kalyn's Kitchen). Phase 1 and gluten-free version of the original recipe)

6 boneless, skinless chicken breasts
3/4 cup parmesan cheese, freshly grated using fine grater
6 oz. goat cheese such as Chevre (I used feta and a little cream cheese)
6 oz. jarred or Kalyn's homemade Sun-dried tomato pesto
1/2 cup fresh basil, finely chopped

Preheat oven to 350 F. Trim all visible fat and tendons from chicken. Put chicken, one at a time, inside a heavy plastic freezer bag and pound with meat mallet or other heavy object until 1/4 inch thick.

Put pesto, goat cheese, and chopped basil in food processor and buzz a few times until mixture is combined but not completely blended. Spread 1/6 of pesto/basil/goat cheese mixture on each chicken breast. Roll up chicken, starting with smallest end and secure with toothpicks if you like. I didn't do this and mine only gaped open a little bit.

Put parmesan cheese in a flat dish, and roll each rolled up chicken breast in the cheese, patting on so you get as much cheese sticking on as you can.

Spray glass casserole dish (I put mine on foil lined baking sheet) with nonstick cooking spray and arrange chicken (make sure the chicken does not touch) Bake 350 F 40-50 minutes, or until chicken is slightly browned and firm, but not hard to the touch. It's recommended you start checking it after 40 minutes, and remove from the oven as soon as the chicken feels firm and is slightly browned. Serve hot.

Note: Kalyn also added that she notice that the cheese that fell off the chicken burned in the bottom of the glass pan before the chicken was done, so you might want to be aware of that and remove it if you see some cheese starting to burn. My chicken was baked on a foil lined baking sheet with nonstick spray and it was just fine.

Tuesday, October 03, 2006

Apple Brown Betty (p2)

I've never had Apple Brown Betty before but saw this in the Everyday Foods Mag (its on their site too) and thought it looked good and was easy to convert Sb. It was extremely light as the bread crumbs create such a delicate texture. It was very different than an apple crisp but still very good.
(serves 6)

Apple Brown Betty (p2)
4 to 5 slices whole wheat bread, torn into large pieces
4 tablespoons (1/2 stick) melted I cant believe its not butter
2 1/2 pounds Gala apples (about 6), peeled, cored, and cut into 1/2-inch-thick slices
2 tablespoons lemon juice
1/3 cup splenda with a few TAB of a good flavored sugar free maple syrup (mock brown sugar)
1/2 teaspoon ground cinnamon, plus more for serving (optional)
1/4 teaspoon ground nutmeg
1/3 to 1/2 chopped pecans or walnuts
sugar free cool whip

1. Preheat oven to 375°. In a food processor, pulse bread until coarse crumbs form (you should have about 2 cups). Spread breadcrumbs on a rimmed baking sheet; bake until golden, 8 to 10 minutes. Let cool completely. Transfer to a bowl, add melted butter, and toss until coated.
2. Meanwhile, place apples in a large bowl, and toss with lemon juice. Stir in mock brown sugar, cinnamon, nutmeg, and half the breadcrumbs. Place in an 8-inch square (or other shallow 2-quart) baking dish (I lightly sprayed the bottom with some cooking spray). Sprinkle with remaining breadcrumbs. Cover dish tightly with aluminum foil.
3. Bake until fruit mixture is bubbling, about 40 minutes. Then remove foil, and continue baking until breadcrumbs have browned and apples are easily pierced with a paring knife, 10 to 15 minutes more. Let cool at least 15 minutes before serving. Top, if desired, with cool whip (or vanilla ice cream) sprinkled with cinnamon. ENJOY!!

5:4 challenge #8 Sweet Shrimp-N-Pasta (p2)


This five four, in my opinion, has been the hardest one yet. The ingredients are: shrimp, snow peas, pineapple, apple and bread crumbs. We get three additional ingredients of our choosing with oil, salt, and pepper being free. At first my thought was a salad. I planned and tried grilling the fruit (apples don't grill very well by the way!) as well as the shrimp and bread. I chose sour dough bread and was going to grill to toast it and then use it as croutons. The grilled pineapple rings and shrimp were going to be placed on a bed of lettuce along with the snow peas and then drizzled with Kraft raspberry vinaigrette for dressing. My shrimp was already precooked and rather tiny so grilling it even the slightest bit was still too much for it. The pineapple and bread turned out great but the apples and shrimp didn't. So I chopped up some apples and pecans and tossed those on top of the salad. My hubby liked it but I was just not wild about it. In theory it was good but I think a lot of it was the fact that the shrimp was over done and dry (even thought I marinated it in the dressing and pineapple juice). I found out a few things by making this dish...1) apples don't grill well at all!, 2) I really don't care for snow peas (they have a tart after taste and 3) I really don't like raspberry dressing. So here I am with what I'm still convinced is a good idea, with some tweaking of course, and yet I cant bring myself to try it again due to how I dislike the flavors of some important ingredients......... So, I tried my second idea and it worked out much much better!


Sweet Shrimp-N-Pasta (P2)
(I really didn't measure so I'm gonna do my best at guesstimating it for you now)
1 to 1 1/2 c shrimp (or enough for 2 people)
! bag of frozen snow peas
3 to 4 slices whole wheat bread crumbs
small can pineapple rings, sliced into chunks with juice divided and reserved
1/2 to 1 c sugar free applesauce
Old Bay Seasoning
salt
Olive oil
whole wheat penne pasta, cooked al dente
1/3 to 1/2 c fresh basil leaves, chopped
  • De-shell the shrimp, rinse,drain well and set aside.
  • In a food processor make bread crumbs, pulsating til you get a fine crumble texture (I used some I had on hand). Place crumbs on a plate and add some Old Bay seasoning (a few dashes) and mix well.
  • In a small bowl add some applesauce and pineapple juice. you want a thick mixture but not as thick as the applesauce on its own. I think I ended up using 2 : 1 of apple sauce to pineapple juice (give or take). Season this mixture with Old Bay seasoning. I didn't measure (sorry) but i think it was 1 to 2 tsp...I added to taste.
  • In a skillet heat up a 1 TAB Olive oil (you really don't want much oil if you are using a nonstick skillet).Dip the shrimp into the apple pineapple mixture and coat with bread crumbs. Fry shrimp til golden brown and allow to drain on a paper towel as you finish the rest.
  • Place snow peas in a microwavable dish with 2 TAB water and microwave 2 mins. Break up any clumps and microwave another 1 min.
  • Boil water for pasta. when its hot add some salt and a little olive oil. When pasta is cooked, drain and place in bowl. Add the snow peas, salt to taste and a drizzle or two of olive oil.
  • In the same skillet as the shrimp was cooked (do not clean or wipe out!) Add a drizzle of olive oil if needed and add the pineapple chunks, remaining juice, a dash of salt, some more old bays seasoning - 2 to 3 dashes and a handful of bread crumbs. Saute this til its thickened and heated through.


To assemble: place some pasta and snow peas on a serving plate. Top with the pasta with the pineapple breadcrumb saute, then the shrimp and then garnish with basil and ENJOY!

Note: even with this new dish i was not wild about the snow peas...i think I just don't care for them. So when I make this again I think instead of them I'll saute up some sliced bell pepper. It will still give the dish a great color and look nice with the penne pasta as well as go nicely with the shrimp and pineapple.

see even all mixed up it is pretty:

Sunday, October 01, 2006

Peach Cobbler (p2)

I adapted this recipe from the June 07 issue of Everyday Food Magazine (page 150).
Peach Cobbler (p2)

Serves 3 (6oz custard cups)
Filling:
1/4 splenda (a bit more depending on how sweet your peaches are)
1/2 TAB cornstarch
peaches (I used a 16 oz bag of frozen sliced peaches, thawed)
a splash of lemon juice
cinnamon and nutmeg with a tiny pinch of cloves, to taste

Preheat oven to 350. In a large bowl, whisk together splenda and cornstarch. Cut peach slices in half for bite size pieces. Add peaches, a dash of lemon juice and spices. Divide filling evenly among three 6-oz custard cups and place on a baking sheet or pie plate.

Topping:
1/2 c ww flour
1 1/2 TAB splenda
1/2 tsp baking powder
1/4 tsp baking soda
1/8 tsp salt
1 1/2 TAB butter (I used "I can't believe its not butter")
1/3 low fat buttermilk (I made my own with skim milk and a little lemon juice)

In a small bowl wisk together flour, sugar, baking powder, baking soda and salt. using a pasty blender, folk or your fingers blend in butter until mixture resembles coarse meal. Add buttermilk; stir just until a dough forms. drop dough onto the peaches and sprinkle dough with splenda and a little cinnamon. Bake until fruit is bubbling and biscuit tipping is golden brown - about 30 to 35 mins. Let cook about 10 mins and serve warm.


My pretty little roses...

Here are some Pict's of my flowers. There have been 7 blooms so far and they all have been so lovely! What's been so very odd is they are all so different from one another color-wise - yet they come from the same small bush. I have gotten a green with pink, bright bright deep yellow with hot pink tips, a white with purple tips, light yellow with purple, and a soft cream yellow and so on. its been interesting to see what blooms next. The has been my first real rose bush as the very first one never produced anything other than two flowers. This is planted in a big metal barrel (same as before) so I can bring it in this winter. I'm a bit worried at the moment as this container is full of water now (as we had a down poor) and now the leaves are turning yellow. I tried to drain off some of the water and put it in an area that wont allow any more water to get in til its needed but the soil is more like mud than solid dirt. I thought I might move it inside into the sun room and hope it bounces back. I hope it does alright since its over watered (offer any suggestions if you know much about this as I would love to save my little rose bush) Its been a fun little rose bush and one that has produced beautiful looking flowers as well as such sweet smelling ones. Hope you enjoy looking at them as much as I have.

this was the first to bloom. it was a nice bright yellow

this isn't the best Pict of this flower but it was actually green base and lightened up towards the tips where it changed into a soft pink. it almost looked liked like there was soft pink lipstick smudges on the petals.
This one was neat. it was almost white with just barely the tips purple

Soft pale yellow

This one was rather vivid and shaped so pretty.


This was my most exciting as it was so very bright and colorful! the yellow was so bright it almost seemed unnatural. The tips were hot pink and together they were extraordinary!


This is the last so far and is, as you can see, just BEAUTIFUL!